/india-vs-pakistan.

india-vs-pakistan.

sachin-tendulkar-man-who-became-god.

sachin-tendulkar-man-who-became-god

india-vs-england-2012-2nd-t20i-preview.

india-vs-england-2012-2nd-t20i-preview.

sehwag-gambhirs-smug-overconfidence.

sehwag-gambhirs-smug-overconfidence.

all-proteas-players-to-be-given-game.

all-proteas-players-to-be-given-game.

Showing posts with label Facebook. Show all posts

Monday, August 19, 2013

How to add a unique and stylish E-mail subscription box in your blog

All bloggers want that their traffic is highest.But it is not only possible by latest posts.Your template also be good looking and Subscription box plays an important role for making it pretty.Now see this below image.Older subscription boxes are not so good as this.This looks more stylish and colourful.

Now for insert this in your blog.Follow these steps.
  1. Open the Dashboard and then open Layout > Add Gadgets > Add html.
  2. Then at the body portion of the page paste this below code.


<style>   .NNBTsocial_box-email{   background:Fff no-repeat 0px 12px ; width:270px;float:center;font-size:1.4em;font-weight:bold;margin:2px 20px 0px 10px;color:#686B6C;  }  .NNBTsocial_box-emailsubmit{   background:#0084CE;cursor:pointer;  color:#fff; border:none;padding:3px;margin:0 0 0px 0;text-shadow:0 -1px 1px rgbaundefined0,0,0,0.25);   -moz-border-radius:2px; -webkit-border-radius:2px; border-radius:2px; font:12px sans-serif;  }   .NNBTsocial_box-emailsubmit:hover{   background:#E98313;   }   .textarea{   padding:2px; margin:0px 2px 0px 2px; background:#f9f9f9; border:1px solid #ccc; resize:none; box-shadow:inset 1px 1px 1px rgbaundefined0,0,0,0.1);   -moz-box-shadow:inset 1px 1px 1px rgbaundefined0,0,0,0.1); -webkit-box-shadow:inset 1px 1px 1px rgbaundefined0,0,0,0.1); font-size:13px;   width:200px; height:20px;color:#666;}  #socialboxNBT   {  text-align:center;font-weight:bold;padding:5px;border:1px solid black;width:300px;  -moz-box-shadow: 0px 0px 8px #000000;-webkit-box-shadow: 0px 0px 8px #000000;box-shadow: 0px 0px 8px #000000;}  </style>  <br />  <div id="socialboxNBT">  <a href="http://feeds.feedburner.com/akashblogger94" imageanchor="1" rel="nofollow" style="float: center; margin-left: .5em; margin-right: 1em;" target="blank"><img border="0" src="https://blogger.googleusercontent.com/img/b/R29vZ2xl/AVvXsEhZpZIeIKsLSWtWmYhWSd64q3MNE-Dj_QFCG0zpNm4LuboyMSNcB5_nPSvD1AcebQuSg_LAfnAmCXEIMhZSA6nBBnKJShLS-e-sjEw4TrWpsThPbIZq2ibnYVZIW21RenG7O3EmBO58RFY/s1600/NNBT-rss.png" /></a>  Submit your Email Address to Get Free latest Articles Directly to your Inbox  <br />  <div class="NNBTsocial_box-email">  <form action="http://feedburner.google.com/fb/a/mailverify" id="feedform" method="post" onsubmit="window.openundefined'http://feedburner.google.com/fb/a/mailverify?uri=NBTLab', 'popupwindow', 'scrollbars=yes,width=550,height=520');return true" target="popupwindow">  <input class="textarea" gtbfieldid="3" name="email" onblur="if undefinedthis.value == &quot;&quot;) {this.value = &quot;Enter email address here&quot;;}" onfocus="if undefinedthis.value == &quot;Enter email address here&quot;) {this.value = &quot;&quot;;}" type="text" value="Enter email address here..." />   <input name="uri" type="hidden" value="akashblogger94" /><input name="loc" type="hidden" value="en_US" />   <input class="NNBTsocial_box-emailsubmit" type="submit" value="Submit" />   </form>  </div>  <style class="text/css">  table  {border-bottom: 0px solid #E6E6E6;float: center;width: 300px;margin:-8px 0 0 0px;}  .subicons  {border-right: 0px solid #E6E6E6;}  .Fadeout {filter:alphaundefinedopacity=100);opacity: 1.0;border:0;  }  .Fadeout:hover{filter:alphaundefinedopacity=80);opacity: 0.8;border:0;  }  </style>  <br /><div class="table"><table>  <tbody><tr>  <td><div class="subicons">  <a class="Fadeout" href="http://www.facebook.com/100006041131460" imageanchor="1" rel="nofollow" target="_blank"><img border="0" src="https://blogger.googleusercontent.com/img/b/R29vZ2xl/AVvXsEgUQaPPMEARkxJBj5yq9kiQdZf-qazHBicz1vwGn-9TIOtgCnKjxmiCPFMpKmAZZzRJ0j9UdueQbIbhGRZqfH0HmHcSGeSKt-rNMnCiAOv5ydR6kyLLqF5GTO2CNZdtZHMVS2zbErPT0AU/s1600/NNBT-facebook-icon.png" /></a></div>  </td><td><div class="subicons">  <a class="Fadeout" href="http://www.twitter.com/akashku9835644" imageanchor="1" rel="nofollow" target="_blank"><img border="0" src="https://blogger.googleusercontent.com/img/b/R29vZ2xl/AVvXsEhYLaz51QiGyBlAzHpWAPQ80hRufP4IJqDy9zrOEQ4npuga0agk5SrTnTZ2UugCd2a8Sy75kCuoRx-pJaNDnDK89jpEARVSCp4uyqK_He11fD1GYY9V1DhpkLJZhx_i_j8xsgN0ouoVSJU/s1600/NNBT-twitter-icon.png" /></a></div>  </td>  <td><div class="subicons">  <a class="Fadeout" href="http://feeds.feedburner.com/akashblogger94" imageanchor="1" rel="nofollow" target="_blank"><img border="0" src="https://blogger.googleusercontent.com/img/b/R29vZ2xl/AVvXsEiRUasmj9Gas9VsUAwft9YKZN7N6nrHMnUqksHaQ48IZlc3c2Rkr8TxW6XgsnM0mf31cUiUrVkyWbAlqTrdICNGGiBc4kGoO3QJrN-4ww_Hx-Yj57b6W3PftAMpqORNVc-FxWbj632sNiY/s1600/NNBT-rss-icon.png" /></a></div>  </td>  <td><a class="Fadeout" href="https://pinterest.com/akashatfbk13" imageanchor="1" rel="nofollow" target="_blank"><img border="0" src="https://blogger.googleusercontent.com/img/b/R29vZ2xl/AVvXsEj-nO8ohxahbU12qkyW0DYm51y5Ho_AO6JgirgQ8EBfRyAOfBBs68fZA0lm8hGXMo0J8BcOaRLbRooyFFSNIq-KWthtVOCCLdoVdYWXwZPIH-DAyA5ZwRpLbWC_-hXHm9qI4VQWHCg1jlU/s1600/NNBT-Pinterest-icon.png" /></a></td>  </tr></tbody></table></div></div> 

How to add 3 in 1 small Follower box Widget in your blogspot

Now I am going to tell something about it-this small 3 in 1 Follower box.The first one is Facebook,when some one click on it the Facebook profile box will open and same in the other Twitter and Google plus box.
         This is one of the best way for increasing your social fans.It will show your friends in your circle.It also used for save area of blog because if you add a like box,follow box it takes a large area and the visitors will not like it and your traffic is become lower.So,it is also a best way for increase your traffic.
For adding it then follow these steps.


  • First,open the dashboard then open Layout>Add Gadget>Add html.
  • Now copy this code and paste it on your body part of your body part of your html box.
  •   <script src="http://code.jquery.com/jquery-latest.js"></script>  <script src="http://apis.google.com/js/plusone.js" type="text/javascript"></script>  <link rel="stylesheet" type="text/css" href="https://dl.dropboxusercontent.com/s/m4krejz6tw6sxlf/3%20in%201%20StyleSheet.css" />  <script src="https://dl.dropboxusercontent.com/s/e5p8j4qnfvgda8p/3%20in%201%20Widget.js"></script>    <div id="on">    <div id="facebook_right" style="top: 12%;">      <div id="facebook_div">        <img alt="" src="https://blogger.googleusercontent.com/img/b/R29vZ2xl/AVvXsEiQ8OVgiE0jja6BaKiEiagki6AOhqduo_12GbRH0kMrNfffBNPPFf9LhoZBQJuBqJafT-08DPCago-kj0CAoDDRv4Y1lDRn_lNLEu9NAzf6wlXxmA71PVIZ-tLrVDCHEb_7zZD9zjVS2yzX/s1600/NBTfacebook_right.png" />        <iframe allowtransparency="true" frameborder="0" scrolling="no" src="//www.facebook.com/plugins/likebox.php?href=http%3A%2F%2Fwww.facebook.com%2F&amp;width=200&amp;height=346&amp;colorscheme=light&amp;show_faces=true&amp;border_color&amp;stream=false&amp;header=false"        style="border: none; height: 346px; overflow: hidden; width: 200px;"></iframe>      </div>    </div>  </div>  <div id="on">    <div id="twitter_right" style="top: 28%;">      <div id="twitter_div">        <img id="twitter_right_img" src="https://blogger.googleusercontent.com/img/b/R29vZ2xl/AVvXsEjgfYx_jRcbl4jAxPJeK0y3CHS4wQOGYw_DZBge7wcRmTDRNKKEr1yaurXlByTSSA-93jvBjdfYEyZd6AZMLmHUzDkCXQPgCyJRPIIVP7G1ILaeJIMPWZQMNl1N2dDtds37ZrQ-2pp_fHsP/s1600/NBTtwitter_right.png" />  <div style="width:248px;font-size:8px;text-align:right;"><script type="text/javascript">  document.write(unescape("%3Cscript src='http://twitterforweb.com/twitterbox.js?username=NewBloggerTips&settings=0,1,2,248,279,ffffff,0,c4c4c4,101010,1,1,336699' type='text/javascript'%3E%3C/script%3E"));</script><a href="http://NewBloggerTips.com" target="_blank"></a></div>        </div>      </div>    </div>    <div id="on">      <div id="google_plus_right" style="top: 45%;">        <div id="google_plus_div">          <img id="google_plus_right_img" src="https://blogger.googleusercontent.com/img/b/R29vZ2xl/AVvXsEjb1iF8n_hda65c8izy2quUycIYcm35ZailSEl42b9KwjB3rN1qwFmVatDQRazBmMD9USme1PA6wsMpAGJIuqz4Rapye8ZZFC8XzNBYC8uxsMUvQd9ttwQ1pXt7VLJ5IYTlvpsUUbrSQRA/s1600/NBTgoogle_plus_right.png" />          <div style="float: left; margin: 10px 10px 10px 0;">            <a href='http://newbloggertips.com'>              <img alt='Tips Tricks And Tutorials' src='https://blogger.googleusercontent.com/img/b/R29vZ2xl/AVvXsEhMzigMREcI-Ko0ksMtYEuCFcHUfLf13PI4946DETm3LviOAcTRb6wAlhiZZ8BNaf9DVXst_l0iC9yPEYPrctpaynUzAh8V4sGThOz8Awap4QFqbefo6Ip8zWZDQtx_6ylMV9lTeZ8cIpQS/s1600/best+blogger+tips.png' />            </a>            <div class="g-plus" data-action="followers" data-height="250" data-href="https://plus.google.com/114850220168831844723" data-source="blogger:blog:followers" data-width="270"></div>            <script type="text/javascript">            (function () {              window.___gcfg = {                'lang': 'en'              };              var po = document.createElement('script');              po.type = 'text/javascript';              po.async = true;              po.src = 'https://apis.google.com/js/plusone.js';              var s = document.getElementsByTagName('script')[0];              s.parentNode.insertBefore(po, s);            })();            </script>          </div>        </div>      </div>  <script src="http://code.jquery.com/jquery-latest.js"></script>  <script src="http://apis.google.com/js/plusone.js" type="text/javascript"></script>  <link rel="stylesheet" type="text/css" href="https://dl.dropboxusercontent.com/s/m4krejz6tw6sxlf/3%20in%201%20StyleSheet.css" />  <script src="https://dl.dropboxusercontent.com/s/e5p8j4qnfvgda8p/3%20in%201%20Widget.js"></script>    <div id="on">    <div id="facebook_right" style="top: 12%;">      <div id="facebook_div">        <img alt="" src="https://blogger.googleusercontent.com/img/b/R29vZ2xl/AVvXsEiQ8OVgiE0jja6BaKiEiagki6AOhqduo_12GbRH0kMrNfffBNPPFf9LhoZBQJuBqJafT-08DPCago-kj0CAoDDRv4Y1lDRn_lNLEu9NAzf6wlXxmA71PVIZ-tLrVDCHEb_7zZD9zjVS2yzX/s1600/NBTfacebook_right.png" />        <iframe allowtransparency="true" frameborder="0" scrolling="no" src="//www.facebook.com/plugins/likebox.php?href=http%3A%2F%2Fwww.facebook.com%2F100006041131460&amp;width=200&amp;height=346&amp;colorscheme=light&amp;show_faces=true&amp;border_color&amp;stream=false&amp;header=false"        style="border: none; height: 346px; overflow: hidden; width: 200px;"></iframe>      </div>    </div>  </div>  <div id="on">    <div id="twitter_right" style="top: 28%;">      <div id="twitter_div">        <img id="twitter_right_img" src="https://blogger.googleusercontent.com/img/b/R29vZ2xl/AVvXsEjgfYx_jRcbl4jAxPJeK0y3CHS4wQOGYw_DZBge7wcRmTDRNKKEr1yaurXlByTSSA-93jvBjdfYEyZd6AZMLmHUzDkCXQPgCyJRPIIVP7G1ILaeJIMPWZQMNl1N2dDtds37ZrQ-2pp_fHsP/s1600/NBTtwitter_right.png" />  <div style="width:248px;font-size:8px;text-align:right;"><script type="text/javascript">  document.write(unescape("%3Cscript src='http://twitterforweb.com/twitterbox.js?username=akashku9835644&settings=0,1,2,248,279,ffffff,0,c4c4c4,101010,1,1,336699' type='text/javascript'%3E%3C/script%3E"));</script><a href="http://NewBloggerTips.com" target="_blank"></a></div>        </div>      </div>    </div>    <div id="on">      <div id="google_plus_right" style="top: 45%;">        <div id="google_plus_div">          <img id="google_plus_right_img" src="https://blogger.googleusercontent.com/img/b/R29vZ2xl/AVvXsEjb1iF8n_hda65c8izy2quUycIYcm35ZailSEl42b9KwjB3rN1qwFmVatDQRazBmMD9USme1PA6wsMpAGJIuqz4Rapye8ZZFC8XzNBYC8uxsMUvQd9ttwQ1pXt7VLJ5IYTlvpsUUbrSQRA/s1600/NBTgoogle_plus_right.png" />          <div style="float: left; margin: 10px 10px 10px 0;">            <a href='http://newbloggertips.com'>              <img alt='Tips Tricks And Tutorials' src='https://blogger.googleusercontent.com/img/b/R29vZ2xl/AVvXsEhMzigMREcI-Ko0ksMtYEuCFcHUfLf13PI4946DETm3LviOAcTRb6wAlhiZZ8BNaf9DVXst_l0iC9yPEYPrctpaynUzAh8V4sGThOz8Awap4QFqbefo6Ip8zWZDQtx_6ylMV9lTeZ8cIpQS/s1600/best+blogger+tips.png' />            </a>            <div class="g-plus" data-action="followers" data-height="250" data-href="https://plus.google.com/115490142879457951931" data-source="blogger:blog:followers" data-width="270"></div>            <script type="text/javascript">            (function () {              window.___gcfg = {                'lang': 'en'              };              var po = document.createElement('script');              po.type = 'text/javascript';              po.async = true;              po.src = 'https://apis.google.com/js/plusone.js';              var s = document.getElementsByTagName('script')[0];              s.parentNode.insertBefore(po, s);            })();            </script>          </div>        </div>      </div>  <script src="http://code.jquery.com/jquery-latest.js"></script>  <script src="http://apis.google.com/js/plusone.js" type="text/javascript"></script>  <link rel="stylesheet" type="text/css" href="https://dl.dropboxusercontent.com/s/m4krejz6tw6sxlf/3%20in%201%20StyleSheet.css" />  <script src="https://dl.dropboxusercontent.com/s/e5p8j4qnfvgda8p/3%20in%201%20Widget.js"></script>    <div id="on">    <div id="facebook_right" style="top: 12%;">      <div id="facebook_div">        <img alt="" src="https://blogger.googleusercontent.com/img/b/R29vZ2xl/AVvXsEiQ8OVgiE0jja6BaKiEiagki6AOhqduo_12GbRH0kMrNfffBNPPFf9LhoZBQJuBqJafT-08DPCago-kj0CAoDDRv4Y1lDRn_lNLEu9NAzf6wlXxmA71PVIZ-tLrVDCHEb_7zZD9zjVS2yzX/s1600/NBTfacebook_right.png" />        <iframe allowtransparency="true" frameborder="0" scrolling="no" src="//www.facebook.com/plugins/likebox.php?href=http%3A%2F%2Fwww.facebook.com%2F100006041131460&amp;width=200&amp;height=346&amp;colorscheme=light&amp;show_faces=true&amp;border_color&amp;stream=false&amp;header=false"        style="border: none; height: 346px; overflow: hidden; width: 200px;"></iframe>      </div>    </div>  </div>  <div id="on">    <div id="twitter_right" style="top: 28%;">      <div id="twitter_div">        <img id="twitter_right_img" src="https://blogger.googleusercontent.com/img/b/R29vZ2xl/AVvXsEjgfYx_jRcbl4jAxPJeK0y3CHS4wQOGYw_DZBge7wcRmTDRNKKEr1yaurXlByTSSA-93jvBjdfYEyZd6AZMLmHUzDkCXQPgCyJRPIIVP7G1ILaeJIMPWZQMNl1N2dDtds37ZrQ-2pp_fHsP/s1600/NBTtwitter_right.png" />  <div style="width:248px;font-size:8px;text-align:right;"><script type="text/javascript">  document.write(unescape("%3Cscript src='http://twitterforweb.com/twitterbox.js?username=akashku9835644&settings=0,1,2,248,279,ffffff,0,c4c4c4,101010,1,1,336699' type='text/javascript'%3E%3C/script%3E"));</script><a href="http://NewBloggerTips.com" target="_blank"></a></div>        </div>      </div>    </div>    <div id="on">      <div id="google_plus_right" style="top: 45%;">        <div id="google_plus_div">          <img id="google_plus_right_img" src="https://blogger.googleusercontent.com/img/b/R29vZ2xl/AVvXsEjb1iF8n_hda65c8izy2quUycIYcm35ZailSEl42b9KwjB3rN1qwFmVatDQRazBmMD9USme1PA6wsMpAGJIuqz4Rapye8ZZFC8XzNBYC8uxsMUvQd9ttwQ1pXt7VLJ5IYTlvpsUUbrSQRA/s1600/NBTgoogle_plus_right.png" />          <div style="float: left; margin: 10px 10px 10px 0;">            <a href='http://newbloggertips.com'>              <img alt='Tips Tricks And Tutorials' src='https://blogger.googleusercontent.com/img/b/R29vZ2xl/AVvXsEhMzigMREcI-Ko0ksMtYEuCFcHUfLf13PI4946DETm3LviOAcTRb6wAlhiZZ8BNaf9DVXst_l0iC9yPEYPrctpaynUzAh8V4sGThOz8Awap4QFqbefo6Ip8zWZDQtx_6ylMV9lTeZ8cIpQS/s1600/best+blogger+tips.png' />            </a>            <div class="g-plus" data-action="followers" data-height="250" data-href="https://plus.google.com/115490142879457951931" data-source="blogger:blog:followers" data-width="270"></div>            <script type="text/javascript">            (function () {              window.___gcfg = {                'lang': 'en'              };              var po = document.createElement('script');              po.type = 'text/javascript';              po.async = true;              po.src = 'https://apis.google.com/js/plusone.js';              var s = document.getElementsByTagName('script')[0];              s.parentNode.insertBefore(po, s);            })();            </script>          </div>        </div>      </div>  <script src="http://code.jquery.com/jquery-latest.js"></script>  <script src="http://apis.google.com/js/plusone.js" type="text/javascript"></script>  <link rel="stylesheet" type="text/css" href="https://dl.dropboxusercontent.com/s/m4krejz6tw6sxlf/3%20in%201%20StyleSheet.css" />  <script src="https://dl.dropboxusercontent.com/s/e5p8j4qnfvgda8p/3%20in%201%20Widget.js"></script>    <div id="on">    <div id="facebook_right" style="top: 12%;">      <div id="facebook_div">        <img alt="" src="https://blogger.googleusercontent.com/img/b/R29vZ2xl/AVvXsEiQ8OVgiE0jja6BaKiEiagki6AOhqduo_12GbRH0kMrNfffBNPPFf9LhoZBQJuBqJafT-08DPCago-kj0CAoDDRv4Y1lDRn_lNLEu9NAzf6wlXxmA71PVIZ-tLrVDCHEb_7zZD9zjVS2yzX/s1600/NBTfacebook_right.png" />        <iframe allowtransparency="true" frameborder="0" scrolling="no" src="//www.facebook.com/plugins/likebox.php?href=http%3A%2F%2Fwww.facebook.com%2F100006041131460&amp;width=200&amp;height=346&amp;colorscheme=light&amp;show_faces=true&amp;border_color&amp;stream=false&amp;header=false"        style="border: none; height: 346px; overflow: hidden; width: 200px;"></iframe>      </div>    </div>  </div>  <div id="on">    <div id="twitter_right" style="top: 28%;">      <div id="twitter_div">        <img id="twitter_right_img" src="https://blogger.googleusercontent.com/img/b/R29vZ2xl/AVvXsEjgfYx_jRcbl4jAxPJeK0y3CHS4wQOGYw_DZBge7wcRmTDRNKKEr1yaurXlByTSSA-93jvBjdfYEyZd6AZMLmHUzDkCXQPgCyJRPIIVP7G1ILaeJIMPWZQMNl1N2dDtds37ZrQ-2pp_fHsP/s1600/NBTtwitter_right.png" />  <div style="width:248px;font-size:8px;text-align:right;"><script type="text/javascript">  document.write(unescape("%3Cscript src='http://twitterforweb.com/twitterbox.js?username=akashku9835644&settings=0,1,2,248,279,ffffff,0,c4c4c4,101010,1,1,336699' type='text/javascript'%3E%3C/script%3E"));</script><a href="http://NewBloggerTips.com" target="_blank"></a></div>        </div>      </div>    </div>    <div id="on">      <div id="google_plus_right" style="top: 45%;">        <div id="google_plus_div">          <img id="google_plus_right_img" src="https://blogger.googleusercontent.com/img/b/R29vZ2xl/AVvXsEjb1iF8n_hda65c8izy2quUycIYcm35ZailSEl42b9KwjB3rN1qwFmVatDQRazBmMD9USme1PA6wsMpAGJIuqz4Rapye8ZZFC8XzNBYC8uxsMUvQd9ttwQ1pXt7VLJ5IYTlvpsUUbrSQRA/s1600/NBTgoogle_plus_right.png" />          <div style="float: left; margin: 10px 10px 10px 0;">            <a href='http://newbloggertips.com'>              <img alt='Tips Tricks And Tutorials' src='https://blogger.googleusercontent.com/img/b/R29vZ2xl/AVvXsEhMzigMREcI-Ko0ksMtYEuCFcHUfLf13PI4946DETm3LviOAcTRb6wAlhiZZ8BNaf9DVXst_l0iC9yPEYPrctpaynUzAh8V4sGThOz8Awap4QFqbefo6Ip8zWZDQtx_6ylMV9lTeZ8cIpQS/s1600/best+blogger+tips.png' />            </a>            <div class="g-plus" data-action="followers" data-height="250" data-href="https://plus.google.com/115490142879457951931" data-source="blogger:blog:followers" data-width="270"></div>            <script type="text/javascript">            (function () {              window.___gcfg = {                'lang': 'en'              };              var po = document.createElement('script');              po.type = 'text/javascript';              po.async = true;              po.src = 'https://apis.google.com/js/plusone.js';              var s = document.getElementsByTagName('script')[0];              s.parentNode.insertBefore(po, s);            })();            </script>          </div>        </div>      </div> 

  • Now replace the red words with your facebook ID,twitter username and Plus google ID

Wednesday, August 7, 2013

How to create like page or fan page in Facebook very easily.

Today the use of social networking is going to touch the sky.All of the peoples in this world are using Facebook social network more in comparison to other.We also want that peoples know me by using or giving more time on Facebook.So, we need a like button page for which people come on our page and like that page through which you become popular.In this topic we are going to discuss how to create a like page.


This is very famous now a days all the peoples ,companies,and other organisation created their own page as for this we are also creating our own page as you see below:


This type of like box comes to your page and as people hits on this like box you get liked.For getting more likes boost your page and increase your likes.
 creating a page:
you have Facebook account then:
Sign In> Come below
there is available create a page.
Create your page now:
                    PAGE

How to embed Facebook posts in Blogger blog.

Social Media has taken the web by storm,and is now increasingly being integrated with various services.Social recommendations have now become a lot more important then they were a few years ago as compared to organic search,which goes on to show that the way the average internet surfs is changing.And it's no wonder that every social network wants you to share it's content all over the web.For that effect ,Facebook,following into the footsteps of Youtube and Twitter ,has launched embeddable posts ,which will enable blogs and websites to share status updates,pictures and videos that are on Facebook.
Sharing your Facebook posts on your blog page could help with the engagement on your site.But before you can embed a post,that particular posts needs to be public.Posts with restricted privacy settings won't be embeddable .So if you're trying to embed your own posts,make sure it is public first.
..................................................................................................................................................................
How to Embed Facebook Posts to your site.
...................................................................................................................................................................

Now, there are two methods to embed posts.The Embed option within Facebook posts,and the Facebook Configurator tool.Both these methods will generate a code that can be embedded on any platform or websites,and not just on Blogger.
The Embed OPTION
Facebook is introducing this option within Facebook posts.If you click on the little drop down arrow next to a post,you will see an "Embed Post" option sitting there,among other options.
                         
If it's a photo, you will see an Embed button underneath the photo where you normally find the Download and delete options.Once you click on that button,Facebook will give you an embed code which you can add any where.

Although this is the easiest way(apparently),Facebook is only slowly rolling it out to profiles and page.Right now, only about 5 Facebook pages have received this options,including Mashable ,CNN,The Huffington post etc.So for now, it doesn't have any real use.And that is what other blogs will tell you.But what they won't tell you about is the second method,with which you can embed any post!

Manually creating an embeddable post

In my opinion , this is the easier option.Nut it involves a bit more work.You first have to grab the URL of the Facebook post you want to embed.For photos, you can easily get the URL by clicking on them.But for other media, isn't as easy.At least it doesn't appear so at first.To get a post's URL,simply click on its timestamp.

        Please go to this URL: https://developers.facebook.com/docs/plugins/embedded-posts/
Paste URL i the field provided.Once your story loads in the tool, click the get code .

Thursday, July 11, 2013

How to add Facebook recommendations Bar in Blogger Blog or Websites.

Recommendations Bar

The recommendations bar lets people like content, get recommendations and share what they’re reading with their friends.
The recommendations bar is always docked to the lower right or left of the screen. When the page loads the recommendations bar is collapsed and people viewing it are shown the option to like your page.
As people navigate toward the end of your page, the plugin expands. The expanded view displays a social recommendation of the next article to read on your site.
You must include Open Graph markup on your stories so Facebook knows how to display them on the site. If you do not include this, the plugin will show an error message instead of a recommendation.

Expanding the plugin

The plugin is expanded once the trigger parameter requirements are met, and the person has been on the page for at least the duration specified in the read_time parameter. There are three values for the trigger parameter:
  • onvisible. The plugin is expanded when people scroll past the exact point where the <fb:recommendations-bar /> tag is placed on the page. This is the simplest option and will work best if you place the tag right at the end of your article's main content. This is the default.
  • X%, where X is any positive integer less than or equal to 100. This specifies the percent of the page that must be scrolled before the plugin is expanded. For example: 100% would indicate that people need to scroll all the way to the end of the page before the plugin expands. 50% indicates that people need to scroll to the middle point of the page.
  • manual. Use this option to manually trigger the plugin. When you want to trigger the plugin, callFB.XFBML.RecommendationsBar.markRead(href); in JavaScript. The href parameter is optional and will default to the current page if not set. If provided, it must match the href parameter on the XFBML tag. The manual trigger is useful when you have more a multipage article. For example on a three-page article, you would add trigger="manual" on pages one and two and never call the markRead JavaScript function on those pages.
The read_time parameter tells the plugin to wait a certain amount of time before it expands. It takes an integer representing the number of seconds. By default this will be set to 30 seconds. The minimum is 10 seconds. Note that in order for the plugin to expand, the trigger condition must be true, and the read_time must be met.
Hey Guys these things which you want know is become famous now a days because every person or blogger want more to famous and this helps you and your blog to famous.Facebook is such a best social networking site where we connect with our friends and family also.On that path Facebook is also providing you to create a page and know how many persons like you and what ever you make page related with.You know Facebook is becoming a part of Websites or blogger because they provides us very good faculty i.e why all peoples or blogger want Facebook like box,Facebook like button,Facebook comment box and much more.Here we know that how to add recommendation bar in your blog or websites.
Do some following steps.
Go to following link:  https://developers.facebook.com/docs/reference/plugins/recommendationsbar/       
Then their some picture like this:
By filling this form you get code like this:

Just paste the codes to your websites or blog then a like box comes in your blog like this:

Attributes

  • href - the URL of the page. The XFBML version defaults to the current page.
  • trigger - when the plugin expands. Note that this parameter is evaluated in addition to the read_time parameter. Default is when a user scrolls past the <fb:recommendations-bar/> tag. There are three options.
    • onvisible - read is published when a user scrolls past the exact point where the XFBML tag is placed on the page.
    • X% - where X is any positive integer less than or equal to 100. Indicates % of page scrolled past before read is triggered
    • manual - use this option to manually trigger the read action. You callFB.XFBML.RecommendationsBar.markRead(href); when you want the plugin to expand. The href parameter is only necessary if the <fb:recommendations-bar/> tag includes an explicit href attribute. By default, this is the current request URL.
  • read_time - The number of seconds before the plugin will expand. Default is 30 seconds. Minimum is 10 seconds.
  • action - The verb to display on the button. Options: 'like', 'recommend'
  • side - the side of the screen where the plugin will be displayed. This will automatically adjust based on the language, or can be set explicitly. Options: 'left', 'right'
  • site - a comma separated list of domains to show recommendations for. The default is the domain of the href parameter.
  • ref - a label for tracking referrals; must be less than 50 characters and can contain alphanumeric characters and some punctuation (currently +/=-.:_). The ref attribute causes two parameters to be added to the referrer URL when a user clicks a link from a stream story about a Like action:
    • fb_ref - the ref parameter
    • fb_source - the stream type ('home', 'profile', 'search', 'other') in which the click occurred and the story type ('oneline' or 'multiline'), concatenated with an underscore.
  • num_recommendations - the number of recommendations to display. By default, this value is 2 and the maximum value is 5.
  • max_age - a limit on recommendation and creation time of articles that are surfaced in the plugins, the default is 0 (we don’t take age into account). Otherwise the valid values are 1-180, which specifies the number of days.

Wednesday, July 10, 2013

How to add Facebook Comment Box to your blog or websites.

Comment Box.
The Comments box is a social plugin that enables people to comment on your site. Features include moderation tools and distribution.
Social Relevance: The Comments box uses social signals to surface the highest quality comments. Comments are ordered to display the most relevant comments from friends and friends of friends as well as the most-liked or active discussion threads. Comments marked as spam are hidden from view.
Distribution: Comments are easily shared with friends or with people who like your Page on Facebook. If people leave the “Post to Facebook” box checked when they post a comment, a story appears on their friends’ news feed indicating that they've made a comment on your website, which will also link back to your site.
Friends and people who like the Page can then respond to the discussion by liking or replying to the comment directly in the news feed or in the Comments box on your site. Threads stay synchronized across Facebook and on the Comments box on your site regardless of where the comment was made.
The mobile version will automatically show up when a mobile device user agent is detected. You can turn this behavior off by setting the mobile parameter to false.
Note:The mobile version of the Comments box ignores the width parameter, and instead has a fluid width of 100% in order to resize well in portrait/landscape switching situations. You may need to adjust your CSS for your mobile site to take advantage of this behavior. If you prefer, you can still control the width via a container element.
You are putting Facebook Comment Box in your websites or blog by two ways.
First through Your Facebook Developers and another through the help of this website.
You have Facebook Account Sign to your Facebook Account> and then click on this https://developers.facebook.com/docs/reference/plugins/comments/
And you have some figure like this:
You have to put your website name on URL to comment on(?)
And then click on get code button you have some picture like this:
Paste the following code in your websites or blog.
If you have blogger account do following steps:
Blogger account sign in> Layout
Html/ Java Script
And paste the code which you get on your screen by doing above steps or paste this only replace our username with your username.
<div class="fb-comments" data-href="http://mylabofblogger.blogspot.in" data-width="470" data-num-posts="10"></div>


How do I know when someone comments on my site?

You can subscribe to the 'comment.create' and 'comment.remove' events through FB.Event.subscribe.

What does the grammar filter do?

  • Adds punctuation (e.g. periods at the end of sentences)
  • Trims extra whitespace
  • Expands slang words (e.g. plz becomes please)
  • Adds a space after punctuation (e.g. Hi,Cat would become Hi, Cat)
  • Fix common grammar mistakes (e.g. convert ‘dont' to ‘don’t’)
    You can enable the grammar filter from the settings section of the plugin.

How can I get an SEO boost from the comments left on my site?

The Facebook comments box is rendered in an iframe on your page, and most search engines will not crawl content within an iframe. However, you can access all the comments left on your site via the graph API as described above. Simply grab the comments from the API and render them in the body of your page behind the comments box. We recommend you cache the results, as pulling the comments from the graph API on each page load could slow down the rendering time of the page.

How do I enable users to comment using other login providers?

On the settings section of the plugin, you can choose to enable third party login on your comments boxes. Currently this will enable users to comment using a Yahoo!, AOL or Hotmail account.

How does the blacklisting words work?

You can enter blacklisted terms from the settings section of the comments box. The content of new comments is checked against the blacklist of terms to see if this comment should have limited visibility. The comment is checked via substring matching. This means if you blacklist the word 'at', if the comment contains the sequence 'a' 't' anywhere it will be marked with limited visibility; e.g. if the comment contained the words 'bat', 'hat', 'attend', etc it would be caught.

I have the first version of the Facebook Comments box, how do I upgrade?

If you are using the original version of the Facebook Comments box, just add 'migrated=1' to the <fb:comments> tag, and the comments box will automatically switch to the new version. In this case, you should not specify the href parameter, and you must keep the XID parameter the same. Once you migrate, you can access the comments as described above. Note that the moderation tools only work with the newer version of the comments plugin (with href specified instead of migrated=1).

If this post is helpful for you please comment and like our pages.
Your MyLabOfBlogger

How to add new Facebook like box in your blogger blog or websites.

Facebook Like box

Hey guys you are now getting knowledge for How to put Facebook like box to your blog or websites. Facebook is very famous social networking site now a days.To many peoples are enjoying Facebook for chat and messaging.In this great world many peoples have created to many blogs and they want that peoples like their Facebook pages that is why to many bloggers and website builder wants to put Facebook like box in their pages.So we are providing you how to put Facebook like box in your websites or blog.
If you are blogger then do some following steps.
Sign in to Blogger.com>Layout
Html/ JavaScript
and the following code in your websites or blog:
Your code is:
<div class="fb-like-box" data-href="https://www.facebook.com/mylabofwebsites" data-width="292" data-show-faces="true" data-stream="true" data-show-border="true" data-header="true"></div>

Change Mylabofblogger with your Facebook Page user name .
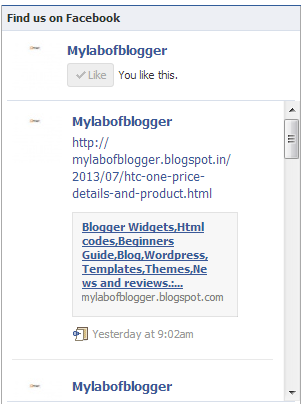
And you are able to see like box like thi.


The like box is a social plugin that enables Facebook Page owners to attract and gain likes from their own website. The like box enables people using your app or website to do the following:
  • See how many people like the Page, and which of their friends like it, too.
  • Read recent posts from the Page.
  • Like the Page with one click, without needing to visit the Page.
The minimum supported plugin width is 292 pixels.

If you use Facebook.Then sign in toYour facebook account.Facebook.com> and go to below links Http://developers.facebook.com/docs/reference/plugins/like-box/
and you get same pictures as like this.Just change my username with your username .And then you get the code and paste it to your website.You get code like this:


Attributes

  • href - the URL of the Facebook Page for this Like Box. Note: After July 2013 migration, href should be an absolute URL
  • width - the width of the plugin in pixels. Default width: 300px.
  • height - the height of the plugin in pixels. The default height varies based on number of faces to display, and whether the stream is displayed. With the stream displayed, and 10 faces the default height is 556px. With no faces, and no stream the default height is 63px.
  • colorscheme - the color scheme for the plugin. Options: 'light', 'dark'
  • show_faces - specifies whether or not to display profile photos in the plugin. Default value: true.
  • stream - specifies whether to display a stream of the latest posts from the Page's wall
  • header - specifies whether to display the Facebook header at the top of the plugin.
  • show_border - specifies whether or not to show a border around the plugin, default true. Set to false to style the iframe with your custom CSS.
  • force_wall - for Places, specifies whether the stream contains posts from the Place's wall or just checkins from friends. Default value: false.
If you like this post please comment and like o Facebook.
Your one and only MYLABOFBLOGGER.

Tuesday, July 9, 2013

How to add Facebook follow button to your blog or websites.

Hey guys you are very excited for putting Facebook follow button on your websites.You have to do simple steps for putting follow button in your websites.If you have blogger.com account you have to do some steps.
Go to Blogger.com>Layout
HTML/JAVASCRIPT
Paste the following code which you get from Facebook developers by learning from here.
This is what mylabofblogger do few steps before putting follow button on website.
You have facebook account if not create now ,then open
Facebook.com>https://developers.facebook.com/docs/reference/plugins/follow/
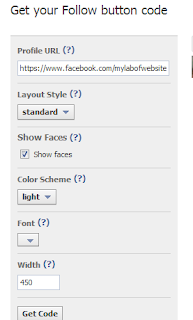
and you have same pictures as you see here.Only change profile URL with your profile username if you have page.If not create a page.
after that you are getting codes like this you have only to paste these codes to your websites or blog.


The Follow button was previously called the Subscribe button.

Follow Button


The Follow button lets other people follow your public updates on Facebook.

There are two Follow button implementations: XFBML and Iframe. The XFBML (also available in HTML5-compliant markup) version is more versatile, and requires use of the JavaScript SDK. The XFBML dynamically re-sizes its height according to whether there are profile pictures to display.
To get started, just use the configurator below to get code to add to your site.

Attributes

  • href - profile URL of the user to follow. This must be a facebook.com profile URL.
  • layout - there are three options.
    • standard - displays social text to the right of the button and friends' profile photos below. Minimum width: 225 pixels. Default width: 450 pixels. Height: 35 pixels (without photos) or 80 pixels (with photos).
    • button_count - displays the total number of followers to the right of the button. Minimum width: 90 pixels. Default width: 90 pixels. Height: 20 pixels.
    • box_count - displays the total number of followers above the button. Minimum width: 55 pixels. Default width: 55 pixels. Height: 65 pixels.
  • show_faces - specifies whether to display profile photos below the button (standard layout only). You must not enable this on child-directed sites
  • colorscheme - the color scheme for the plugin. Options: 'light' (default) and 'dark'
  • font - the font to display in the plugin. Options: 'arial', 'lucida grande', 'segoe ui', 'tahoma', 'trebuchet ms', 'verdana'
  • kid_directed_site - If your web site or online service, or a portion of your service, is directed to children under 13 you must enable this.
  • width - the width of the plugin.
Is this topic very helpful for you then please comment and like us on facebook.Thank you.

How to add follow button facebook in blogger.

Not every blog owner writes about the world. Sometime blogs are made for personal opinions. In this case, Facebook Fan Pages could give you productive results. Here, you should use Facebook profile and the subscription feature to let users follow you directly on Facebook. Recently, one of our users asked us that How to add a Facebook Follow Button in Blogger.  The follow button is a lot similar to the like box, functionalities and the appearance of the follow button is pretty much identical to the like box. In this article, we will show you How to add a Facebook Follow button for Single Author in blogger.


If you are running on a single author, then you can directly get the follow button code from Facebook Widget page and paste it anywhere you want to display that widget i.e. widget area, template and etc.

How to Add a Facebook Follow button in Blogger?

The first thing you need to do is to go to Facebook Social Plugins website page. Now enter the complete URL of your Facebook Profile for which you are willing to generate the follower button. There are a lot of options for customization which could help you in creating a perfect match for your website.

After entering your Profile URL, you can clearly see how your widget would appear on your website. Once bit of customization is done, press the “Get Code” button at the bottom.
Now a new window would pop out, select the “iFrame” Tab and copy the code. Now paste it anywhere you would like to show this widget. For example, if you are willing to show it in your sidebar then, go to Blogger.com >> Layout >> Add a Gadget >> Add HTML/JavaScript and simple paste the code there.
<div id="fb-root"></div>
<script>(function(d, s, id) {
  var js, fjs = d.getElementsByTagName(s)[0];
  if (d.getElementById(id)) return;
  js = d.createElement(s); js.id = id;
  js.src = "//connect.facebook.net/en_US/all.js#xfbml=1";
  fjs.parentNode.insertBefore(js, fjs);

}(document, 'script', 'facebook-jssdk'));</script>
this is follow buuton of mylabofblogger.blogspot.in,so plaese change it from yours.
https://www.facebook.com/mylabofwebsites

Monday, July 8, 2013

Facebook Graph Search, a semantic search engine announced by the company earlier this year is now being rolled to more users.

Facebook's new search feature, Graph Search, rolls out to more users
Time to bid adieu to Facebook's rudimentary search feature! The new and improved Graph Search makes it easier to find people, places, photos and interests on the network.


Facebook Graph Search, a semantic search engine announced by the company earlier this year, is now being rolled out to U.S. users and those using site in the US English setting.
Facebook had made its Graph Search available to select users earlier this year. Facebook says after six months of user testing and feedback, the feature is now ready for general users.
"Over the past few months, tens of millions of people have helped improve the product just by using it and giving feedback," Facebook says in blog post, which is supposed to be published on Monday.
The Graph Search results focus on four core points – people, places, photos and interests. People search gives you results such as “friends who live in my city,” “people from my hometown who like hiking,” “friends of friends who have been to Yosemite National Park,” “software engineers who live in San Francisco and like skiing," "people who like things I like," "people who like tennis and live nearby"

For photos, Graph Search shows results such as “photos I like,” “photos of my family,” “photos of my friends before 1999,” "photos of my friends taken in New York," “photos of the Eiffel Tower”.

Similarly, search for places shows “restaurants in San Francisco,” “cities visited by my family,” "Indian restaurants liked by my friends from India," “tourist attractions in Italy visited by my friends,” “restaurants in New York liked by chefs," "countries my friends have visited" and Interest shows “music my friends like,” “movies liked by people who like movies I like,” "languages my friends speak," “strategy games played by friends of my friends,” "movies liked by people who are film directors," "books read by CEOs".  Read more about Graph Search's features here.
Facebook is believed to have taken on Google Search with its Graph Search. Facebook, however, denies this. "Graph Search isn't Web search. We aren't duplicating what Bing does and what Google does, but rather we are making things easier for people to find on Facebook," ABC News quotes Facebook COO Sheryl Sandberg as saying at at the All Things D conference earlier this summer.

Saturday, July 6, 2013

Facebook announces a new SDK for iOS and Open Graph for mobiles

The new set of announcements are aimed at providing a better experience for
mobile app developers to integrate Facebook into their applications. Though
most of the announcement concerns iOS devices, further updates for the
Android platform are to be expected soon.


Facebook has made a new set of announcements related to mobile phones at its Mobile Developer’s Conference held in New York today. It has announced that it will be releasing the Open Graph platform for mobile phones. This is a big change for the mobile ecosystem where Open Graph Mobile can work wonders and drastically improve the way in which apps integrate with Facebook thus providing much easier access to social graph information. Besides this announcement, the social networking giant also released a newer version of its Facebook SDK 3.5 for iOS and improved upon its Facebook Login for mobiles.

The new Object API makes it much easier for mobile developers to create Open Graph objects on mobile devices without needing a web server. There is also a new “Native Share Dialog” which is currently available for iOS apps as a limited beta which allows publishing of Open Graph actions from a mobile device.

While all these updates are already on the way for iOS devices, more updates for Android devices are also in the works as mentioned by Douglas Purdy on the Facebook developer’s blog post. Apart from these technical updates to its platform, Facebook also announced a new Technical Partner program which will include companies who provide products like Sencha Touch, C# SDK, Node.js, Corona SDK etc.

Facebook is working towards making mobile app developers integrate more and more into its Social platform on the mobile web too. Its products like Sign in with Facebook, Facebook Comments, Like and Share buttons have already penetrated deep into the traditional websites which heavily use these plugins to provide more social features to their experience. According to Douglas Purdy, “More than 81% of top 100 grossing iOS apps and 70% of top 100 grossing Android apps integrate with Facebook. With the new tools we’re unveiling today, we’re excited to see even more high quality mobile apps integrate with Facebook to engage with our 680+ million mobile users.”

Monday, July 1, 2013

What is Facebook and Facebook f8 and why it is used by many peoples,students and everyone.

Facebook:
Who doesn't know Facebook right?In fact because of the movie, everyone even knows about the story of Facebook's inception.To recap:Facebook is a social networking site launched in February 2004 by Mark Zuckerberg and his roommates Eduardo Saverin,Andrew McCollum,Dustin Moskovitz and Chris Hughes.Registered users can create profiles,upload photos and videos,chat, send messages etc.It was originally created only for Harvard students then gradually grew to include other colleges and finally today anyone over the age of 13.It is available in 37 different languages.The most popular features is the Wall which is like a virtual bulletin board.Since May 2007 Facebook opened its developer's platform to let third party developers build applications and widgets.Once approved these could be distributed and publically used.Facebook offers a range of privacy settings to its users, but of course the site keeps getting a lot of flak from privacy advocates from time to time.A little known fact about the Facebook homepages is that the before 2007 it contained Al Pacino's face which was dubbed 'the Facebook Guy'.


Facebook f8:
Facebook f8 is a yearly conference event held by facebook.It takes place in San Francisco California.
It was started with the purpose of bringing together all the entrepreneurs and developers who are contributing to building the social web.The social web is an abstract concept which describes social relations that foster social interaction and link people through the web.The highlight of Facebook F8 is the starting keynote speech by Zuckerberg himself followed by discussions on various topics.Just after the event Facebook conducts an eight hour 'hackathon' which is where this events gets the name F8. All new feature and announcements from Facebook are made public here for the first time.Similar events have been held by Apple -World wide Developer's Conference (WWDC) and Google- Google I/O.

Friday, June 7, 2013

Americans find Google more reputable than Facebook and Apple: Poll

Americans find Google more reputable than Facebook and Apple: Poll


Washington: Majority of people prefer using Google over its rivals Apple and Facebook when it comes to the all-important game of reputation, a new poll has found.

According to the Washington Post-ABC News Poll, this asked respondents how they feel about some of the country's top tech firms, showed that 83 percent of Americans have a favourable view of Google as compared to 72 percent people who prefer Apple and 60 percent who supported Facebook.

The poll shows how different Americans view Apple, Facebook and Google.

According to the Washington Post, the overall results are similar to responses that respondents gave last year, when a Washington Post-ABC News Poll found that Google had an 82 percent favourable rating, as compared to Apple at 74 percent and Facebook at 58 percent.

The poll found that Americans between the ages of 18 and 29 tended to have higher goodwill towards the tech firms. But Apple's standing with users under age 30 dropped significantly from last year's poll.

The iPhone and iPad maker has a 71 percent favourable rating with the youngest respondents, down from last year's 81 percent rating.

Facebook is still far more popular among the youngest users polled, favourable ratings outnumber unfavourable by 3 to 1 for 18- to 29-year-olds, the poll found.

Gamer City z

Free for your eye videos